Looking for budget-friendly, creative manicure options? Try press-on nails today.
These press-ons have brought about a revolution in the beauty industry to provide a stylish, quick, and cost-effective alternative to traditional manicures.
Press-on nails have come to the limelight, especially since the lockdown phase, when most people could not go to nail salons.
This guide on how to put on press-on nails will help explore the method, procedure, and application tips to ensure long durability.

Table of Contents
What are Press-on Nails?
In simple words, press-on nails meaning painted, fake nails that are glued to your natural nails. These are a type of DIY manicure with many synonyms, such as false nails, fake nails, glue-on nails, etc. You can generally find them in various shapes, sizes, all colours and nail designs for a longer wear time and flawless look.
How Do Press-on Nails Work?
Press-on nails are generally available in kit form and include a cuticle pusher, the nails, nail glue, and a file. You can also stumble upon a five-compartment container with multiple nail sizes to choose from. This further increases the chances of finding press-on nails that perfectly fit your nail shape. If there is any issue with nail size, the file does help.
The process is as simple as gluing them on your nails after choosing your press-ons. If you don’t prefer glue, certain press-on nail kits also include sticky, double-sided tabs to glue them to your nails.
More Information For You: How to Do a Manicure at Home
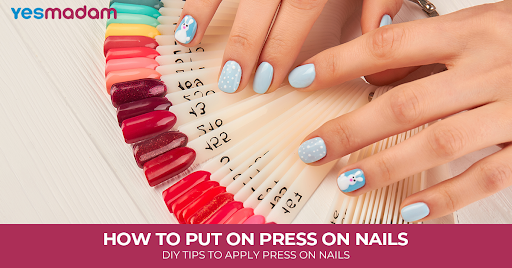
How to Apply Press-On Nails: A Step-by-Step Guide
Here are the steps on how to use press-on nails to ensure better results and a cleaner process.
Step 1: Begin with nail prep.
For a high-quality nail appearance, prep your nails and cuticles before you apply the press-ons. Slowly clean old nail polish and apply a cuticle remover, if you wish.
To avoid water sinking into the nails and causing them to swell, do not soak your nails for at least a few hours before you apply press-on nails. This will prevent weakening of the glue seal.
Step 2: Push back your cuticles.
Move your cuticle an inch down to the nail bed base. You can do this gently using a cuticle stick so as not to damage the surrounding skin.
Step 3: Rub and file the nail bed.
Using a back-and-forth motion, gently buff the surface of your nails. Apply minimal pressure and buff gently to remove the shine from your nails without causing damage to the nail bed.
Step 4: Clean and dehydrate nails.
To make room for a clean base for your press-on, clean nails using alcohol; it will help clear your nails of debris, oil, and excess moisture, thereby rendering the surface dehydrated.
Step 5: Choose the right nail sizes.
This step works best before you start applying press-ons. Compare your press-on nail size against your natural nail size to select the right size for each finger. For a mess-free experience, set aside the press-on nails in the chosen order of applying them on each finger.
For correct measure, hold the press-ons over the natural nails and check that they do not fit tightly or extend past your nail bed.
Step 6: Apply glue.
Apply a thin layer over your natural first finger. You can always slightly brush a little more glue from the inner side of your press-on nails and wipe off the excess with a paper towel. Underapplying might lead to air bubbles and premature lifting.
Step 7: Apply press-on nails.
Line the base of your press-on nail with that of the base of your natural nail by holding them at a 45-degree angle. Stay firm in this posture for 20 seconds. To ensure complete adhesion, without any air bubbles, move your finger back and forth a little.
Step 8: Alternate hands while you apply
It is recommended to start your way from the pointer finger to the thumb, thereby applying one nail at a time to alternating hands. This will help make sure that the pointer finger and thumb are the last nails left for applying the press-ons.
Step 9: Wait
Allow a minimum duration of 2 hours for press-ons to dry before wetting the hands. Avoid using your hands aggressively and bumping your nails against anything. The recommendation is to apply the press-on nails before going to bed to provide the glue sufficient time to set in all night long.
Recommended You: 13 Nail Care Tips You Can Follow At Home

Do’s and Don’ts When Applying Press-On Nails
For a seamless look and longer wear time, follow the dos and don’ts while you apply press-on nails.
| Dos | Don’ts |
| Prep your nails at their best to help the glue adhere better. | Do not skip the nail prep part for better glue adhesion and to prevent premature lifting. |
| File the press on nails to adjust their length and shape accordingly. | Don’t remove press-ons incorrectly, as it might damage the natural nails. |
| Dry your nails thoroughly with alcohol to ensure there is no moisture retention. | Don’t get your nails wet too soon to provide enough time for the glue to dry and set on the nails. |
| Prioritize applying glue correctly, and apply a thin layer on both the press-on nail and the natural nail. | Don’t apply too much glue, as it might spill from the sides and spread on your skin, and it will be difficult to remove. |
Don’t Miss: How To Choose The Perfect Type Of Nail Extension
How to Remove Press On Nails? Step-by-Step Removal Guide
Wondering how to remove press on nails without damage? Follow the below-listed effective removal instructions:
- Prepare a warm, hot foam-based soapy water solution in a bowl.
- For 10-15 minutes, soak the nails in the solution to let the glue lose its strength.
- Use a cuticle pusher correctly to loosen the nails from the edges.
- Apply the hard end of the cuticle pusher to remove any hard glue from the back of the nails.
- Buff your nails to remove any glue stains from your natural nails.
- Repeat the steps on the alternate hand fingers.

Press on Nails Pros and Cons
Press-on nails offer a convenient and cost-effective way to achieve a polished manicure at home, but they also have some drawbacks compared to other nail enhancements.
Pros:
Convenience and Cost-Effectiveness: Press-on nails are easy to apply and remove at home, saving time and money compared to salon visits.
Variety of Styles and Designs: A wide array of press-on nail designs is available, allowing for easy customization and changing up nail looks.
Minimal Nail Damage: Properly applied and removed press-on nails can be gentler on natural nails than other methods like acrylics or gels, especially when using adhesive tabs or less harsh glues.
Easy Removal: Press-on nails are relatively easy to remove, often without the need for harsh chemicals or filing, reducing the risk of damage to the natural nail.
Related Blog: Nail Polish Colours for All Seasons
Cons:
Durability: Press-on nails typically last for about one to two weeks and can pop off easily if not applied correctly.
Nail Damage Potential: Improper application or removal can cause damage to natural nails, especially if using harsh glues or removing the press-on nails by force.
Less Customizable: While press-on nails offer a variety of designs, they may not offer the same level of customization as salon nail services.
Potential for Infections: Press-on nails can sometimes trap moisture and create a breeding ground for bacteria and fungi, potentially leading to infections if not cleaned and maintained properly.
Conclusion
The simple steps on how to put on press on nails help to get beautiful salon-quality nails at home. For long-lasting wear, take care of your press-on nails through gentle handling while keeping the hands and cuticles moisturized, and avoid getting lotion or oils on nails to avoid weakening the glue adhesive. Thus, follow these steps for the best application and unravel the diverse range of press-on nails as a nail art enthusiast.
FAQs
How long do press-on nails last?
Press-on nails tend to last for about 1-2 weeks, as per the adhesive used and how well they are applied.
Can I shower with press-on nails?
Yes, but you need to wait for at least 2 hours to allow the glue to dry by avoiding prolonged or vigorous water exposure.
What are the three common mistakes to avoid with press-on nails?
Here are the three most common blunders to avoid with press-ons :
- Wetting them too fast.
- Not able to find the right size for the nails.
- Not applying sufficient glue.
Is there a possibility to reuse press-on nails?
Yes, you can reuse press-on nails. Careful removal while ensuring that the adhesive residue is thoroughly cleaned off before reapplying is the key.
Is water effective in removing press-on nails?
The combination of the water and soap method is a great way to remove press-on nails about to lift and pop off.
What are the disadvantages of press-on nails?
The key disadvantages of press-on nails are:
Less durability: For about 1-2 weeks, and can pop off easily if not applied properly.
Cheap appearance: In case of bad quality, they might appear as natural and polished as acrylic nails.
What tools are needed to remove press-on nails?
Pure acetone or liquid soap, a nail file (optional), a nail buffer, a cuticle pusher, etc., are necessary to remove press-ons.
Which is the quickest method to remove press-on nails?
The fastest way to remove press-on nails is a combination of warm water and soap, along with a cuticle pusher or nail file.
Does pressing on nails ruin and weaken your nails?
Yes, keeping the press-on nails for a long time, exceeding the recommended time, might cause issues like breakage and brittle nails.
Why do people opt for press-on nails?
The popularity of press-on nails lies in the fact that press-on nails don’t damage easily and will always shine.